Multipass VM Manager Cheatsheet: Ubuntu, Windows & macOS Guide
Multipass installation, setup, and essential commands
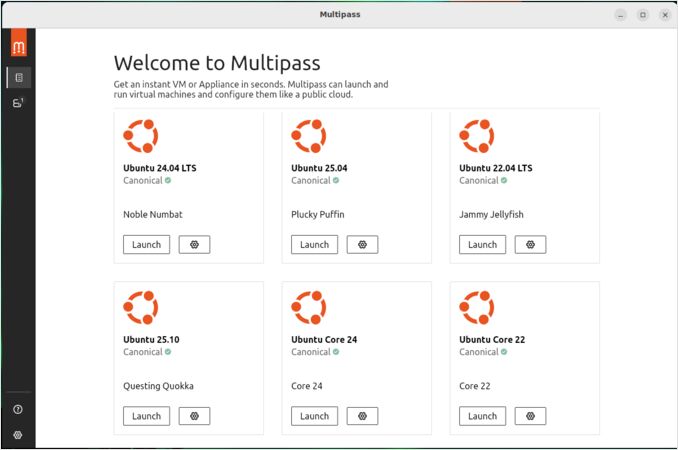
Multipass is a lightweight virtual machine manager that makes it easy to create and manage Ubuntu cloud instances on Linux, Windows, and macOS.
Whether you’re a developer needing isolated environments, a DevOps engineer testing configurations, or someone learning Linux, Multipass provides a simple command-line interface to spin up Ubuntu VMs quickly.

What is Multipass?
Multipass is Canonical’s official tool for creating and managing Ubuntu virtual machines. It’s designed to be simple, fast, and cross-platform, making it an excellent choice for developers who need consistent Ubuntu environments across different operating systems.
Key Features
- Cross-platform: Works on Linux, Windows, and macOS
- Lightweight: Minimal resource overhead compared to traditional VMs
- Cloud-init support: Configure VMs with cloud-init metadata
- Snapshot support: Create and restore VM snapshots
- Network integration: Easy networking between host and VMs
- SSH access: Built-in SSH key management
Most Useful Commands
# Quick reference
multipass launch --name dev --cpus 2 --memory 4G --disk 20G
multipass shell dev
multipass mount ./project dev:/home/ubuntu/project
multipass snapshot dev before-changes
multipass restore dev before-changes
multipass delete dev
multipass purge
Installation
Ubuntu/Linux
# Install via snap (recommended)
sudo snap install multipass

# Or install via apt
sudo apt update
sudo apt install multipass
Windows
- Download the Windows installer from multipass.run
- Run the installer as administrator
- Multipass will use Hyper-V by default (Windows 10 Pro/Enterprise) or fall back to VirtualBox
macOS
# Install via Homebrew
brew install --cask multipass

# Or download from multipass.run
Basic Usage
Creating Your First VM
# Create a VM with default settings
multipass launch

# Create a VM with specific name
multipass launch --name my-vm

# Create a VM with specific Ubuntu release
multipass launch 22.04 --name ubuntu-22

# Create a VM with custom resources
multipass launch --name dev-vm --cpus 2 --memory 4G --disk 20G
Managing VMs
# List all VMs
multipass list

# Start a VM
multipass start my-vm

# Stop a VM
multipass stop my-vm

# Delete a VM
multipass delete my-vm
multipass purge  # Remove all deleted VMs
Accessing VMs
# Open shell in VM
multipass shell my-vm

# Execute command in VM
multipass exec my-vm -- ls -la

# Copy files to/from VM
multipass transfer file.txt my-vm:/home/ubuntu/
multipass transfer my-vm:/home/ubuntu/file.txt ./
Once inside a Multipass VM, you’ll have access to a full Ubuntu shell environment. For efficient command-line work, refer to our Bash Cheat Sheet for essential commands and shortcuts.

Multipass Cheatsheet
VM Management Commands
# Create and launch
multipass launch                    # Create default VM
multipass launch --name vm1        # Create named VM
multipass launch 20.04 --name old  # Specific Ubuntu version

# Resource allocation
multipass launch --cpus 2 --memory 4G --disk 20G --name dev

# VM control
multipass start vm1                # Start VM
multipass stop vm1                 # Stop VM
multipass restart vm1               # Restart VM
multipass suspend vm1              # Suspend VM

# Information
multipass list                     # List all VMs
multipass info vm1                 # VM details
multipass get local.privileged-mounts  # Check mount settings
File Operations
# File transfer
multipass transfer file.txt vm1:/home/ubuntu/
multipass transfer vm1:/home/ubuntu/file.txt ./
multipass transfer --recursive ./folder vm1:/home/ubuntu/

# Mount host directory
multipass mount /host/path vm1:/vm/path
multipass umount vm1:/vm/path
Network Configuration
# Network info
multipass info vm1 | grep IPv4

# Port forwarding (Windows/macOS)
multipass set local.port-forwarding=true
multipass restart vm1
Snapshots and Backups
# Create snapshot
multipass snapshot vm1 snapshot1

# Restore snapshot
multipass restore vm1 snapshot1

# List snapshots
multipass list --all
Advanced Configuration
Cloud-init Integration
Create a cloud-config.yaml file:
#cloud-config
package_update: true
package_upgrade: true
packages:
  - docker.io
  - git
  - curl

users:
  - name: developer
    sudo: ALL=(ALL) NOPASSWD:ALL
    shell: /bin/bash
    ssh_authorized_keys:
      - ssh-rsa AAAAB3NzaC1yc2EAAAADAQABAAABgQC...

runcmd:
  - systemctl enable docker
  - systemctl start docker
Launch VM with cloud-init:
multipass launch --cloud-init cloud-config.yaml --name configured-vm
Custom Images
# List available images
multipass find

# Use specific image
multipass launch daily:22.04 --name daily-vm
Integration with Development Tools
Docker Integration Multipass works excellently with Docker for containerized development. You can run Docker inside Multipass VMs or use Multipass to create isolated environments for Docker development.
Development Environments For Python development, you can set up isolated environments similar to Python virtual environments but with full OS isolation. For VS Code users, Multipass VMs can be used as remote development environments, complementing Dev Containers in VS Code for scenarios requiring full OS isolation.
Self-Hosting Applications Multipass is perfect for testing self-hosted applications like Gitea or Ollama in isolated environments. For container orchestration, you can run Kubernetes clusters inside Multipass VMs and use our Kubernetes Cheatsheet for managing your containerized workloads.
Troubleshooting
Common Issues
# Check Multipass status
multipass get local.driver

# Reset Multipass
multipass purge
sudo snap restart multipass

# Check VM logs
multipass logs vm1
Performance Optimization
# Enable privileged mounts for better performance
multipass set local.privileged-mounts=true

# Configure memory limits
multipass set local.memory=8G
Comparison with Alternatives
Multipass vs Docker
- Multipass: Full VMs, better for OS-level testing, more resource intensive
- Docker: Containers, more efficient, better for application deployment
Multipass vs VirtualBox/VMware
- Multipass: Command-line focused, cloud-init support, easier automation
- VirtualBox/VMware: GUI-based, more configuration options, better for desktop use
Multipass vs Proxmox
- Multipass: Lightweight, single-VM focus, great for development environments
- Proxmox: Full virtualization stack, better for production environments, advanced features like clustering and high availability
Multipass vs Vagrant
- Multipass: Ubuntu-focused, simpler setup, better for single-VM scenarios
- Vagrant: Multi-provider support, complex provisioning, better for multi-VM setups
Best Practices
- Resource Management: Allocate appropriate CPU and memory based on your workload
- Snapshot Strategy: Create snapshots before major changes
- Network Security: Use proper firewall rules for exposed services
- Backup Strategy: Regularly backup important VM data
- Cleanup: Remove unused VMs to free up disk space
When to Use Multipass
Choose Multipass when:
- You need full Ubuntu VMs for development
- You want simple command-line VM management
- You’re working across different operating systems
- You need cloud-init configuration support
- You want to test self-hosted applications in isolation
Consider alternatives when:
- You need maximum performance (use Docker containers)
- You need complex multi-VM setups (use Vagrant)
- You need GUI-based management (use VirtualBox/VMware)
Multipass excels at providing simple, consistent Ubuntu development environments across platforms, making it an excellent choice for developers who need reliable VM management without the complexity of traditional virtualization tools.
Useful Links
- Official Multipass Documentation
- Multipass GitHub Repository
- Cloud-init Documentation
- Ubuntu Cloud Images
- Proxmox in 2025: A Practical, All-In-One Virtualization Stack
- Configure VirtualBox Shared Folders for Linux Guest OS
- GPU monitoring applications in Linux / Ubuntu
- How to Install Ubuntu 24.04 & useful tools
- Using Dev Containers in VS Code

