Flutter on AWS Amplify
AWS Amplify with flutter support
A quickstart - how to Create Flutter fullstack project on AWS Amplify platform.

When
Amplify is a very useful platform for hosting of full stack applications.
Among other howtos Here is a quickstart how to spin up a new flutter project that would nicely integrate with AWS Amplify.
Install
Before you get started, make sure you have the following installed:
- Node.js v18.17 or later - (Install Node.js with NVM)
- npm v9 or later
- git v2.14.1 or later (Install some lovely tools for linux)
- You will also need to create an AWS Account, if you don’t have it yet. AWS Amplify is part of the AWS Free Tier.
- A stable version of Flutter - (Install Flutter)
- Configure your AWS account to use with Amplify instructions. (see below)
If you have IAM profile attach the AmplifyBackendDeployFullAccess managed policy to your IAM user.
otherwise - see below configure...
For the updated info see https://docs.amplify.aws/flutter/start/quickstart/
Configure your AWS account to use with Amplify instructions
https://docs.amplify.aws/flutter/start/account-setup/
- Create user with Amplify permissions
Sign in to the AWS Console to access IAM Identity Center page and choose Enable.
A dialog will open, prompting you to “Choose how to configure IAM Identity Center in your AWS environment.”
- Select Enable with AWS Organizations and choose Continue.
Next, we are going to automate a number of steps that simulate the operations of setting up a user in the IAM Identity Center console.
-
To get started open CloudShell, located in the console footer.
-
Paste the following command in the CloudShell terminal and enter an email address you would like to associate with this AWS account:
read -p "Enter email address: " user_email # hit enter
Enter email address: <your-email-address>
- Now, run the following command
response=$(aws sso-admin list-instances)
ssoId=$(echo $response | jq '.Instances[0].IdentityStoreId' -r)
ssoArn=$(echo $response | jq '.Instances[0].InstanceArn' -r)
email_json=$(jq -n --arg email "$user_email" '{"Type":"Work","Value":$email}')
response=$(aws identitystore create-user --identity-store-id $ssoId --user-name amplify-admin --display-name 'Amplify Admin' --name Formatted=string,FamilyName=Admin,GivenName=Amplify --emails "$email_json")
userId=$(echo $response | jq '.UserId' -r)
response=$(aws sso-admin create-permission-set --name amplify-policy --instance-arn=$ssoArn --session-duration PT12H)
permissionSetArn=$(echo $response | jq '.PermissionSet.PermissionSetArn' -r)
aws sso-admin attach-managed-policy-to-permission-set --instance-arn $ssoArn --permission-set-arn $permissionSetArn --managed-policy-arn arn:aws:iam::aws:policy/service-role/AmplifyBackendDeployFullAccess
accountId=$(aws sts get-caller-identity | jq '.Account' -r)
aws sso-admin create-account-assignment --instance-arn $ssoArn --target-id $accountId --target-type AWS_ACCOUNT --permission-set-arn $permissionSetArn --principal-type USER --principal-id $userId
- To validate that this worked, run the following command in the CloudShell. If
printf "\n\nStart session url: https://$ssoId.awsapps.com/start\nRegion: $AWS_REGION\nUsername: amplify-admin\n\n"
You should see
Start session url: https://d-XXXXXXXXXX.awsapps.com/start
Region: us-east-1
Username: amplify-admin
Now create a password for the user that we need for the next step.
-
In the IdC console, navigate to Users > amplify_admin > Reset password > Send an email to the user with instructions for resetting the password.
-
Check your email (make sure you also check your spam folder). Click on the Reset password link and choose a password of your choice. When signing in make sure to use amplify-admin as the Username.
-
Now, set up an AWS profile that is linked to the user you just created on your local machine. There are a few options for getting IAM Identity Center user credentials, but we will use the AWS CLI configuration wizard.
-
Open your terminal, you are ready to configure an AWS profile that uses the SSO user. Use the information from CloudShell to populate the information below.
aws configure sso
| SSO session name (Recommended): amplify-admin
| SSO start URL: <START SESSION URL>
| SSO region: <your-region>
| SSO registration scopes [sso:account:access]: <leave blank>
| Attempting to automatically open the SSO authorization page in your default browser.
| If the browser does not open or you wish to use a different device to authorize this request, open the following URL:
|
| https://device.sso.us-east-2.amazonaws.com/
|
| Then enter the code:
|
| SOME-CODE
-
After you provide this information, the browser will automatically open asking you to sign in with the username and password you just created and configure a multi-factor device to authenticate.
-
Now return to the terminal and enter the following information:
The only AWS account available to you is: <your-aws-account-id>
Using the account ID <your-aws-account-id>
The only role available to you is: amplify-policy
Using the role name "amplify-policy"
CLI default client Region [us-east-1]: <your-region>
CLI default output format [None]:
Make sure to set the profile name to default. Alternatively, remember the auto-generated profile name; you will need this later.
If you already have default profile configured - it will offer you another profile name
CLI profile name [amplify-policy-<your-aws-account-id>]: default
To use this profile, specify the profile name using --profile, as shown:

aws s3 ls --profile default
- If you inspect ~/.aws/config, you should now see the SSO profile:
nano ~/.aws/config
[profile default]
sso_session = amplify-admin
sso_account_id = <your-aws-account-id>
sso_role_name = AdministratorAccess
region = <your-region>
[sso-session amplify-admin]
sso_start_url = https://xxxxxx.awsapps.com/start#
sso_region = <your-region>
sso_registration_scopes = sso:account:access
- Bootstrap your AWS account
Now you are ready to use this AWS profile with AWS Amplify.
Open your Amplify project and start the sandbox.
that’s the next step!!! without project this will not work.
If you have multiple local profiles or named your profile something other than default, you can specify a profile with –profile.
npx ampx sandbox
or
npx ampx sandbox --profile <profile-name>
Create flutter Amplify app
flutter create my_amplify_app
cd my_amplify_app
Create Amplify backend
npm create amplify@latest -y
Running this command will scaffold Amplify backend files in your current project with the following files added:
├── amplify/
│   ├── auth/
│   │   └── resource.ts
│   ├── data/
│   │   └── resource.ts
│   ├── backend.ts
│   └── package.json
├── node_modules/
├── .gitignore
├── package-lock.json
├── package.json
└── tsconfig.json
the output will be looking like
Installing devDependencies:
 - @aws-amplify/backend
 - @aws-amplify/backend-cli
 - aws-cdk@^2
 - aws-cdk-lib@^2
 - constructs@^10.0.0
 - typescript@^5.0.0
 - tsx
 - esbuild

Installing dependencies:
 - aws-amplify

✔ DevDependencies installed
✔ Dependencies installed
✔ Template files created
Successfully created a new project!

Welcome to AWS Amplify!
 - Get started by running npx ampx sandbox.
 - Run npx ampx help for a list of available commands.

Amplify collects anonymous telemetry data about general usage of the CLI. Participation is optional, and you may opt-out by using npx ampx configure telemetry disable. To learn more about telemetry, visit https://docs.amplify.aws/react/reference/telemetry
you see? you can execute…
npx ampx configure telemetry disable
Now configure Amplify’s per-developer cloud sandbox
To deploy your backend use Amplify’s per-developer cloud sandbox. This feature provides a separate backend environment for every developer on a team, ideal for local development and testing. To run your application with a sandbox environment, you can run the following command:
npx ampx sandbox --outputs-format dart --outputs-out-dir lib
or
npx ampx sandbox --outputs-format dart --outputs-out-dir lib --profile <profile-name>
Adding Authentication
The initial scaffolding already has a pre-configured auth backend defined in the amplify/auth/resource.ts file. We’ve configured it to support email and password login but you can extend it to support a variety of login mechanisms, including Google, Amazon, Sign In With Apple, and Facebook.
The fastest way to get your login experience up and running is to use our Authenticator UI component available in the Amplify UI library.
To use the Authenticator, you need to add the following dependencies to your project:
pubspec.yaml:
dependencies:
  amplify_flutter: ^2.0.0       # to connect your application with the Amplify resources.
  amplify_auth_cognito: ^2.0.0  # to connect your application with the Amplify Cognito resources.
  amplify_authenticator: ^2.0.0 # to use the Amplify UI components.
After adding the dependencies, you need to run the following command to install the dependencies:
flutter pub get
Update your main.dart file to use the Amplify UI components
main.dart:
import 'package:amplify_auth_cognito/amplify_auth_cognito.dart';
import 'package:amplify_authenticator/amplify_authenticator.dart';
import 'package:amplify_flutter/amplify_flutter.dart';
import 'package:flutter/material.dart';

import 'amplify_outputs.dart';

Future<void> main() async {
  try {
    WidgetsFlutterBinding.ensureInitialized();
    await _configureAmplify();
    runApp(const MyApp());
  } on AmplifyException catch (e) {
    runApp(Text("Error configuring Amplify: ${e.message}"));
  }
}

Future<void> _configureAmplify() async {
  try {
    await Amplify.addPlugin(AmplifyAuthCognito());
    await Amplify.configure(amplifyConfig);
    safePrint('Successfully configured');
  } on Exception catch (e) {
    safePrint('Error configuring Amplify: $e');
  }
}

class MyApp extends StatelessWidget {
  const MyApp({super.key});
  @override
  Widget build(BuildContext context) {
    return Authenticator(
      child: MaterialApp(
        builder: Authenticator.builder(),
        home: const Scaffold(
          body: Center(
            child: Column(
              mainAxisAlignment: MainAxisAlignment.center,
              children: [
                SignOutButton(),
                Text('TODO Application'),
              ],
            ),
          ),
        ),
      ),
    );
  }
}
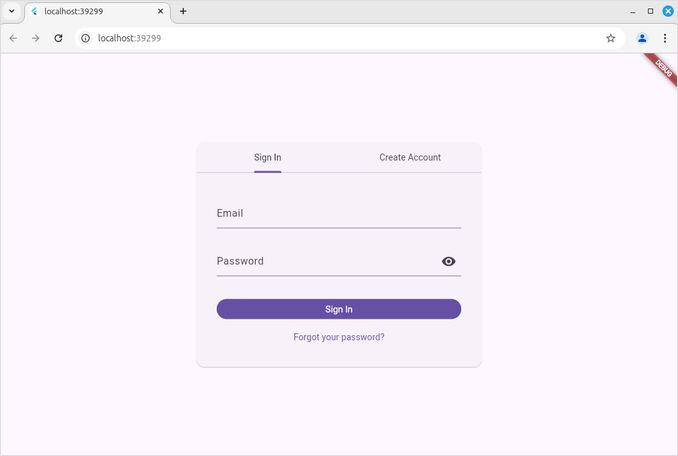
And now look at this beauty the authentication page is here:

and AWS Cognito does the email verification already
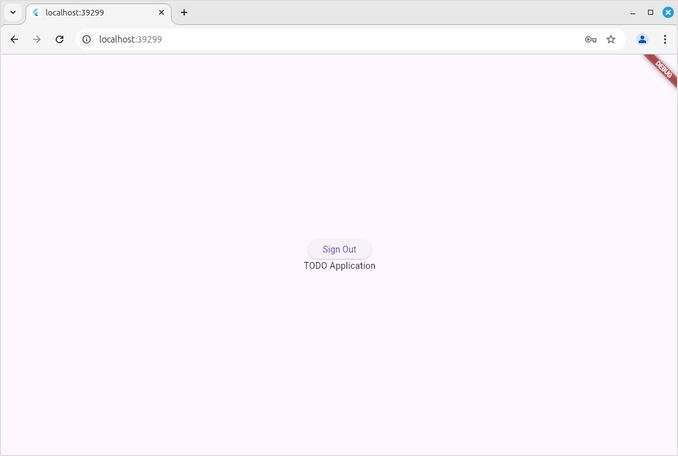
Not much inside, but still:


