
Deploy flutter project to AWS amplify
Including staging and production environments
When you created Flutter project with AWS Amplify backend, the next step is to deploy it. Here is how to Deploy Flutter project to AWS Amplify hosting
AWS Amplify is the Amazon service for development and hosting fullstack applications. Some people say it’s good only for prototyping but we are not here to discuss particular suitability, but to review how to implement this hosting.

Flutter fullstack app structure
Flutter fullstack app consists of two main components
- flutter frontend
- some backend
The frontend can be compiled to Web app, Android app, IOS app, all these are deployed differently. Where we will review only web one.
And the backend of Flutter fullstack project, when it’s done with AWS Amplify - is a set of JavaScript lambda functions. Typescript to be precise. Not a huge variety of options - GraphQL functions, REST with DynamoDB, some AWS S3 access… Nevertheless, quick and easy.
Configuring AWS Amplify deployment
OK. let’s create AWS Amplify deployment
- Go to https://console.aws.amazon.com/amplify/apps , choose your favorite region.
- Click
Create new appbutton - Select your Git provider. Lucky you are if you created your AWS account before August 2024, because after that AWS is not providing AWS Codecommit service to new customers. But I did, so using AWS Codecommit in this test. Click the
Nextbutton. - Select repository and branch of your flutter app to be deployed from. Click the
Nextbutton. - Now we are on the page
App settings, where the wizard detected the Amplify Gen2 app, and incorrectly configured build frontend. We will fix it later. ClickNext.

- Review the summary, click
Save and Deploy - You will see your new deployment in progress
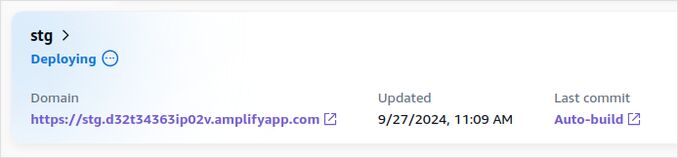
- And then you see it’s miraculously deployed
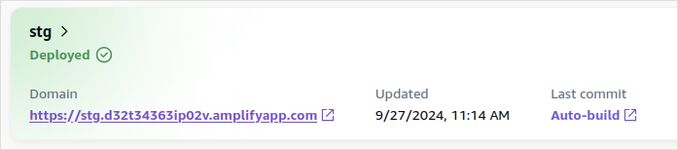
When you click on this domain link you will see just an empty browser screen. That’s because it’s not building your Flutter app as yet.
Do not worry, we need only one thing to do to fix it.
- On your left pannel click
Hosting / Build Settings, you will see something like:
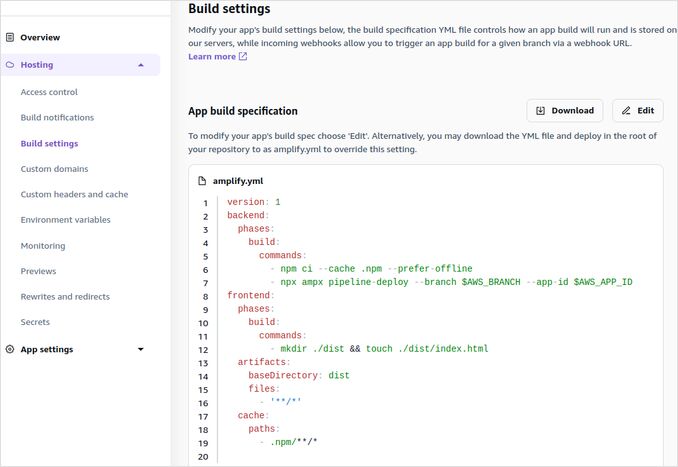
- Click Edit and paste Frontend build config, keeping artifacts and cache bits.
frontend:
  phases:
    preBuild:
      commands:
        - echo "Installing Flutter SDK"
        - git clone https://github.com/flutter/flutter.git -b stable --depth 1
        - export PATH="$PATH:$(pwd)/flutter/bin"
        - flutter config --no-analytics
        - flutter doctor
        - echo "Installing dependencies"
        - flutter pub get
        - echo "Generating backend connection"
        - npx ampx generate outputs --format dart --out-dir lib --branch $AWS_BRANCH --app-id $AWS_APP_ID
    build:
      commands:
        - echo "Building Flutter web application without WASM support"
        - flutter build web
See the full example of compile and deploy script below.
-
Click
Save, go to your deployment page, and clickRedeploy this version. Or Commit and push some changes to your branch. -
Wait will it finishes rebuilding and redeploying and navigate to your app.
Staging and Production environments
You don’t need special configs or additional env variables for Prod, Staging and other environments per se. Amplify deploument already provides env vars $AWS_BRANCH -and $AWS_APP_ID. So our script when deploying different branch will deploy backend to different stage, and connect frontend to this stage. You just ned to create new deployment of your app and select different branch. That’s all/
See the detailed description below.
When you compile backend see the bit
npx ampx pipeline-deploy --branch $AWS_BRANCH --app-id $AWS_APP_ID
It produces file amplify_outputs.json, which is needed by react frontend:
[INFO]: File written: amplify_outputs.json
but for flutter frontend we need amplify_outputs.dart.
The original doc doesn’t say much, about flutter frontend but important point is there:
Generate the config for a branch environment by running:
npx ampx generate outputs --app-id <your-amplify-app-id> --branch <your-git-branch-name> --format dart --out-dir lib
This script generates dart bachend connecting code (file lib/amplify_outputs.dart) for Flutter frontend to use.
And because you specify parameters --app-id <your-amplify-app-id> and --branch <your-git-branch-name> - the backend will be different for each branch deployed.
This file should not be included into git repo. Check that the .gitignore in app project contains
# amplify
node_modules
.amplify
amplify_outputs*
amplifyconfiguration*
If you push lib/amplify_outputs.dart to git and don’t do npx ampx generate outputs... - your deployed frontend will try to connect to developer sandbox, not the proper staging or production backend.
The real script for build config on amplify hosting should be:
npx ampx generate outputs --format dart --out-dir lib --branch $AWS_BRANCH --app-id $AWS_APP_ID
Example of Amplify.yaml
Found somewhere on reddit, let’s just keep it here.
Full example of Amplify.yaml building and deploying Flutter web app to AWS Amplify hosting:
version: 1
backend:
  phases:
    build:
      commands:
        - npm ci --cache .npm --prefer-offline
        - npx ampx pipeline-deploy --branch $AWS_BRANCH --app-id $AWS_APP_ID
frontend:
  phases:
    preBuild:
      commands:
        - echo "Installing Flutter SDK"
        - git clone https://github.com/flutter/flutter.git -b stable --depth 1
        - export PATH="$PATH:$(pwd)/flutter/bin"
        - flutter config --no-analytics
        - flutter doctor
        - echo "Installing dependencies"
        - flutter pub get
        - echo "Generating backend connection"
        - npx ampx generate outputs --format dart --out-dir lib --branch $AWS_BRANCH --app-id $AWS_APP_ID
    build:
      commands:
        - echo "Building Flutter web application without WASM support"
        - flutter build web
  artifacts:
    baseDirectory: build/web
    files:
      - '**/*'
  cache:
    paths:
      - flutter/.pub-cache
Useful links
- Fixing Flutter errors on AWS Amplify: [WARNING] fatal Not a valid object name origin/master
- Flutter project with AWS Amplify backend
- Install Flutter
- Flutter (Dart) Cheat Sheet
- Amplify Documentation for Flutter on .aws
- Install Node.js
- Dockerising Flutter Web app with dockerised Flutter build and Nginx
